BLOGGER TEMPLATES AND TWITTER BACKGROUNDS »

Tuesday, March 26, 2013

Shepherd's Pie

I've had shepherd's pie a few times now and was never too crazy about it. It's good, but just kinda blah. Well I found this recipe and wanted to try it. It's a good way to use up left over mashed potatoes and the filling comes together really fast. Luke and Nick LOVE this so that's another bonus. It is definitely the best shepherd's pie I've had!This makes about 5 servings.


2-3 cups prepared mashed potatoes

For the meat filling:
1/2 cup chopped onion
1 clove garlic, minced
1 pound ground beef
1 teaspoon kosher salt
1/2 teaspoon ground pepper
2 tablespoons all-purpose flour
2 tablespoons tomato paste
1 cup chicken broth (or 1 cup water with 1tsp bullion)
1 teaspoon Worcestershire sauce
1 teaspoon rosemary
1 teaspoon thyme leaves
2 cups of veggies, (I usually do a bag of corn and peas from the freezer)

Directions

Preheat the oven to 350 degrees F.

Brown the meat with the onion and drain. Sprinkle the meat with the flour and toss to coat. Add the garlic and stir to combine. Add salt and pepper and continue to cook for another minute. Add the tomato paste, chicken broth, Worcestershire, rosemary, thyme, and stir to combine. Add the veggies. (thaw them first if frozen) Bring to a boil, reduce the heat to low, and simmer slowly until the sauce is thickened slightly.
 
Spread evenly into a 9x9 glass baking dish. Top with the mashed potatoes. Place on the middle rack of the oven and bake for 25 minutes or just until the potatoes begin to brown.

Read more at: http://www.foodnetwork.com/recipes/alton-brown/shepherds-pie-recipe2/index.html?oc=linkback


Thursday, March 7, 2013

Raspberry Cream Cheese Brownie Bites

First a warning, do not make these without muffin liners! I didn't have liners and didn't want to wait till I did to try this recipe. The result was a gooey delicious mess that I couldn't extract from the tin without making a mess.

My liner-free brownies...


And what they were supposed to look like...


Moving on...


Prepare your brownie mix as directed on the package.
Pour batter into prepared tin with liners
Do not fill more than halfway, you need to leave room for the cream cheese and raspberry

Cream Cheese Filling
8oz cream cheese, softened
1 egg
1/3 cup sugar
1 tsp vanilla extravt

Blend together until smooth. Pour about 1-2 tablespoons on top of each brownie

Then top with raspberry preserves. I didn't measure this, I just used as much as would fit :)

bake at 350 for 25-27 minutes. It's a little hard to tell when these are done. I took mine out at 25 minutes, next time I might go for 27 as mine were pretty gooey! I also had left over cream cheese filling so I poured that into a little dish and baked it with left over raspberry filling :)

I can't wait to make these again, WITH a liner!

Thursday, January 17, 2013

Mexican Chicken Skillet

I was going to make sloppy joes one night this week. About an hour before getting dinner started I checked my email and found this recipe from Kraft in my inbox. It was really good and really easy once I changed it up a little bit.


2 cups cooked rice, white or brown
       Prepare your rice using low sodium chicken broth instead of water. If you don't have reduced       sodium broth use 1/2 broth and 1/2 water in preparing your rice or this dish ends up too salty
 
1/2 cups reduced-sodium chicken broth
1/4 cup cream cheese or sour cream
1lb diced uncooked chicken 
1 jar of salsa, I used medium which was so good, but rendered this dish toddler/baby unfriendly
1/2 cup  KRAFT Shredded Cheddar Cheese
 

In a skillet pour another 1/2 cup or so of broth and add the diced chicken. Simmer until chicken is cooked through, 8-10 minutes. The smaller your chicken pieces the faster it will cook. Add more broth if needed to keep chicken from sticking to the pan. Add the cooked rice and salsa. Stir in the sour cream and cheese. Serve on a plate. I think this would make a very good filling for a soft burrito as well!
 
Mine didn't really look anything like the picture since I diced the chicken and used salsa instead of a boring old chopped tomato, but what's a recipe without a photo!

Crock Pot Chicken Cacciatori

Traditionally you would use bone in chicken pieces like drum sticks and thighs for this dish. I just cook with what's in the freezer. There is no quick dash to the grocery store when it's 35 miles away! I used two diced chicken breasts, about a pound and a half of meat. And since this is crock pot style and supposed to be EASY there is no dredging the chicken in flour and searing in a skillet of hot butter or oil... although I am sure that would be delicious if you're up for the extra work!


Thanks Google images for this picture. There are over 6 pages of chicken cacciatori pictures, so why take my own?? :P 


3 lbs chicken pieces, thighs and drum sticks
1 large onion, thinly sliced
1 (6 ounce) can tomato paste
1 can of Italian style diced tomatoes undrained
6 ounces sliced mushrooms
1 green bell pepper, finely chopped
2 -4 garlic cloves, minced
2 teaspoons oregano
1 teaspoon dried basil (we have basil in a squeeze tube, its amazing!!)
1/2 teaspoon celery powder
1-2 teaspoons salt
3 tablespoons olive oil
1 teaspoon crushed red pepper flakes (optional)

Dump all into crockpot and cook on low 7 hours. Serve over spaghetti

Beef Stroganoff

Wow, now posts since October! Well seeing that we've eaten 3x a day everyday since the last time I posted its easy to say I am behind! Now that I think about it, morning sickness started in October and is finally subsiding. I'm finally in the mood for food again and lots of it! Dinner around here has been rather hectic. Nicholas is usually in his high chair hollering. By the time I get food in front of him he is too upset to eat. Usually then he screams through half the meal before realizing there is food right in front of him, if only he would calm down enough to eat it! The woes of being one.

Thanks Betty Crocker for the picture and recipe base :)

Beef Stroganauff is a new one for me, I have never made it before. I found I really like it! We had a package of stew meat in the freezer so that is what I used instead of sirloin. One thing Andy can't bring himself to eat is mushrooms. So I skipped those and used a whole green pepper instead.


1 pounds beef sirloin steak, 1/2 inch thick
8 ounces fresh mushrooms, sliced (I used 1 chopped green pepper)
2 medium onions, thinly sliced
1 garlic clove, finely chopped
2-3Tbsp butter or margarine
1 can beef flavored broth 
1/2 teaspoon salt
1 teaspoon Worcestershire sauce
1/4 cup all-purpose flour
1 1/2 cups sour cream ( I only needed about 1/2 this much, maybe I had less volume than the original recipe since I skipped the mushrooms)
3 cups hot cooked egg noodles
  • 1. cut beef across grain into about 1 1/2x1/2-inch strips 
  • 2. Cook mushrooms, onions and garlic in butter in 10-inch skillet over medium heat, stirring occasionally, until onions are tender; If you used mushrooms remove the veggies from skillet so mushrooms don't get too "mushy." If using peppers leave them in the skillet to continue to soften while you cook the beef
  • 3. Cook beef in same skillet until brown. Stir in 1 cup of the broth, the salt and Worcestershire sauce. Heat to boiling; reduce heat. Cover and simmer 15 minutes or until meat is cooked through
  • 4.  Stir remaining broth with flour; stir into beef mixture. Add the mushroom mixture if needed. Heat to boiling, stirring constantly. Boil and stir 1 minute. Stir in sour cream; heat until hot (do not boil). Serve over noodles.  
  • Thursday, October 11, 2012

    Meatloaf Cupcakes

    Yesterday I had a lot of rare free time. Nick was sleeping off the shots he got at the pediatrician. He spent most of the day snoozing in his crib. I had ground beef in the fridge. Blah blah ground beef and I wanted to do something not boring with it. Then I found meatloaf cupcakes, PERFECT!!! We just so happened to have some cooked bacon in the fridge.  Andy considers bacon to be some sort of health supplement so I decided to use it as "sprinkles." Cute huh??? Yields 8 cupcakes


    For meatloaf bottom:
    1/4 cup Parmesan cheese
    1/4 cup bread crumbs
    1/2 teaspoon ground black pepper
    1 teaspoon Wostershire sauce
    1/4 cup onion, finely chopped
    1 tablespoon garlic, minced
    1 lb ground beef or turkey
    1/2 teaspoon salt
    1 egg 
    I had some McCormick hamburger seasoning so I threw in a teaspoon of that too! 

    Meatloaf Glaze
    1/4 cup ketchup
    1 tablespoon Wostershire sauce
    1/2 tablespoon brown sugar

    1. Preheat oven to 350
    2. Spray muffin tins with non stick spray
    3. Mix together meatloaf ingredients. (my LEAST favorite part of meatloaf is getting cold meatloaf hands)
    4. Fill muffin tins with the meat mixture to the top, but not overflowing
    5. Mix together glaze ingredients and spoon over each cupcake
    6. Bake for 30 minutes
    7. Carefully tilt the tin over the sink to pour off the fat

    Mashed Potato Frosting
     2 cups of mashed potatoes prepared however you want. I like salt, pepper, garlic powder, milk, and either a tablespoon of butter or cream cheese.

    I happened to have some piping bags and tips to pipe the mashed potatoes on top. You can also just put it in a ziplock baggie and cut off a corner to use as a piping bag. Add crumbled bacon on top and you're done!


    Raspberry Cream Pie

    Last week the Mennonite grocery had Driscoll's raspberries for 50 cents! I was thrilled! Seeing raspberries for anything less than 3.50$ is thrilling! I bought 6 containers for 3$. There are still 3 in the fridge that are awaiting us. I found this pie on allrecipes and compiled it from two different recipes. It called for two cups of sour cream... Well it just so happens that Greek yogurt was 3 for a dollar this week. So I subbed the sour cream for Greek yogurt and saved about 500 calories :D So this is technically a "diet" pie... which is why I ate at least half of it!


    1 (9 inch) pie shell
    3 cups raspberries (about 12oz)
    3/4 cup white sugar
    1tbsp cornstarch
    1/3 cup all purpose flour
    2 cups fat free Greek yogurt
    1/2 tsp vanilla extract  

    Topping
    1/2 cup brown sugar
    1/2 cup all purpose flour
    1/4 cup cold butter


    1. Preheat oven to 400 degrees
    2. Place raspberries in the bottom of the crust
    3. Mix the sugar, cornstarch, flour, vanilla, and yogurt until blended and smooth
    4. Pour over raspberries
    5. Place pie uncovered into the oven (the topping comes later!)
    6. Bake for 30 minutes 

    Meanwhile cut the butter into the sugar and flour. I like to do this by hand, until you have course crumbs.

    7. After 30 minutes remove the pie from the oven and sprinkle on the topping. Return to the oven for 15 minutes. Top will be golden brown and the pie should be pretty firm. Mine was a touch jiggly but firmed up nicely as it cooled.  


    Thursday, September 20, 2012

    Stuffed Acorn Squash

    Another Taste of Home goodie. I made this once with ground beef since I didn't have any sausage. It was still good, but not as good as the sausage. Luke eats the cranberries and the meat, and then Nick eats the stuffing pieces and the squash so it works out pretty well.

    The squash is cooked in the microwave which is so easy! And very fast. It looks gourmet and time consuming but it couldn't be easier. My acorn squashes were 2lbs each, but I still ended up with extra stuffing. I also never made this with the spinach called for.


    Ingredients

    • 2 medium acorn squash
    • 1 pound bulk spicy pork sausage
    • 1/2 cup chopped onion
    • 1 egg
    • 2 tablespoons milk
    • 1 cup fresh baby spinach, finely chopped
    • 1-1/2 cups soft bread torn into stuffing sized pieces
    • 1/2 cup dried cranberries

    Directions

    • Cut squash in half; remove and discard seeds. Place squash cut side down in a microwave-safe dish. Microwave on high for 10-12 minutes or until tender.
    • Meanwhile, crumble sausage into a large skillet; add onion. Cook over medium heat until meat is no longer pink; drain. In a large bowl, beat egg and milk; stir in the spinach, bread crumbs, cranberries and sausage mixture.
    • Turn squash cut side up. Stuff with sausage mixture. Cover and microwave on high for 2-3 minutes. Yield: 4 servings.

    Friday, September 14, 2012

    Baked Chicken Enchilladas

    My mother in law sent me a box recently with all sorts of treasures... Including my favorite, cooking magazines! This came out of taste of home :) Next time I make it I will probably through in some corn. I cut the sour cream in half and substituted with fat free cottage cheese. It was still nice and creamy without being a calorie fest. Luke refused to eat this. I don't know if he was just being cranky, but mommy and daddy liked it! (oh and don't worry, Luke ate dessert so he didn't go to bed hungry)

    Ingredients

    • 4-1/2 cups chopped chicken (I threw two chicken breasts in the oven for an hour that morning)
    • 1 can (28 ounces) green enchilada sauce
    • 1/2 cup sour cream
    • 3/4 cup cottage cheese
    • 9 corn tortillas (6 inches), shredded into 1-1/2-inch pieces
    • 16 ounces shredded Monterey Jack cheese (I used a little less)

    Directions

    • Mix chicken together with enchillada sauce, sour cream, cottage cheese, and most of the shredded cheese 
    • In a greased 13-in. x 9-in. baking dish, layer the chicken mixture alternating with the shredded tortillas. The final layer should be torillas. Sprinkle with the remaining cheese
    • Cover and bake at 375° for 40 minutes. Uncover; bake 10 minutes longer or until bubbly. Let stand for 15 minutes before serving.


    Pumpkin Banana Bread

    I had a lonely cup of pureed pumpkin sitting in my fridge. It was left over from last week's pumpkin donuts. It wasn't enough to make a pie, plus I don't have cloves. I tried making a pumpkin pie without cloves last fall and it just wasn't the same :(

    It's hard to say if this is Banana Pumpkin Bread, or Pumpkin Banana Bread. Both flavors come through in this very moist fall-ish bread. Andy really liked it, Nick really liked it, Luke really liked it, and the floor got to taste some too. I sliced the bananas thin instead of mashing them before tossing them in the batter. The bread had actual banana pieces in it which made it so moist. Thanks food.com!


    1 cup brown sugar (I reduced it to 3/4)
    1/2 cup white sugar
    1/2 cup vegetable oil
    2 eggs
    1 cup canned pumpkin
    2 bananas, sliced
    1 3/4 cups flour
    1 teaspoon baking soda
    1/2 teaspoon baking powder
    1/2 teaspoon salt
    1 teaspoon cinnamon
    1 teaspoon nutmeg
    1/2 teaspoon clove
    1/2 teaspoon allspice
    ( I don't have cloves or allspice, so I sub'ed 1/2tsp of pumpkin pie spice)
    1/4 cup milk (or 1/4 cup yogurt)

    Directions:

    1 Preheat oven to 325°F.
    2 Mix together sugars, oil and eggs.
    3 Add sliced banana, pumpkin, and milk (or yogurt).
    4 Mix dry ingredients together. Slowly add to wet ingredients, mixing as you go. 
    5. Pour into a greased loaf pan, leaving about an inch of room at the top.
    6. Bake in preheated oven for about 1 hour and 20 minutes. Or until a knife inserted in the middle comes out clean. Mine was done at 1hr and 17 minutes. Cool on wire rack. Enjoy!


    Tuesday, September 4, 2012

    Pastry Crust

    Lately I have been making butter crusts. You can use this same recipe with vegetable shortening, like Crisco. For now though I am on a butter kick, especially since butter in Iowa is 1.99$ a pound. Since I'm used to paying at least 3$ a pound I just can't help myself!


    The secret to making pie crust not so painful is get the dough COLD COLD COLD. You want to use COLD butter, and ICE water. Once your dough is assembled stick it in the fridge for 30 minutes before you even attempt rolling it.

    I have used this crust for pot pies, meatball calzones, and fruit pies. The site where I found this states this is enough for two crusts. Perhaps I roll mine too thin, but I get enough dough for three 9" pies every time I make this.


    • 2 1/2 cups all-purpose flour, plus extra for rolling
    • 1 cup (2 sticks or 8 ounces) salted butter, very-cold, cut into 1/2 inch cubes
    • 1 teaspoon salt
    • 1 teaspoon sugar
    • 6 to 8 Tbsp ice water
    Pour half a glass of water, then fill the rest with ice.

    Mix butter with flour, salt, and butter until it forms little crumbs with pea sized pieces of butter. I do this with my hands.

    Add water 1TBSP at a time. Stop at 6Tbsp and mix it together well by hand. Too much water will make the dough tough, so don't add the last two tablespoons of water unless you need it. 

    Work the dough just enough to form two disks do not over-knead. You should be able to see little bits of butter in the dough. These small chunks of butter are what will allow the resulting crust to be flaky. Sprinkle a little flour around the disks. Wrap each disk in plastic wrap and refrigerate 30 minutes to 1 hour. If it is in the fridge longer than and hour you will need to let it sit at room temperature for about 10 minutes so that it is not too stiff and cold to roll.

    Put 1/4 cup or so of flour down on your clean rolling surface. Place dough on floured surface, sprinkle more flour onto dough and roll it out adding more flour if dough sticks to rolling pin. Take a dinner knife (not a sharp pointy knife!) and slide it gently between counter and dough to loosen it from counter. Gently lift it and place into pie plate. I like to use the rolling pin to roll it up off the counter.

    Trim overhang to 1/2 - 3/4 inch and fold under against the pie plate and flute edges. After I roll out both of the crusts I collect the scraps, form a ball, wrap with plastic, and stick in the freezer for another time.

    Taste of Home has a nice step by step picture tutorial here.


    Frozen Peanut Butter Pie

    I love this recipe. I'm not usually a big fan of peanut butter pie because it tends to be so rich that it kinda makes me feel sick after a couple bites. This recipe isn't like that. It truly is perfect! I have made it twice now. The original recipe wanted you to get TWO pies out of this filling. Unless you want to be known as the "chintzy pie lady" use this filling for one 9" pie.


    • 6oz package cream cheese (I used 1/3 less fat)
    • 1 cup confectioners' sugar
    • 3/4 cup peanut butter
    • 3/4 cup milk (skim is fine)
    • 1 16 ounce package of cool whip thawed, reserve 3/4 cup for the top
    • 1 prepared crust
      • 1 cup of cookie crumbs mixed with 2Tbsp melted butter (Oreo's, Nutter Butters, or graham crackers)
      • Press into greased pie plate, bake at 350 for 8 minutes
    Instructions
    1. Beat together cream cheese and confectioners' sugar. Mix in peanut butter and milk. Beat until smooth. Fold in whipped topping.
    2. Pour into prepared crust
    3. Spread reserved cool whip on top
    4. Garnish with whatever you want... left over cookie crumbs, shaved chocolate, etc etc
    5. Freeze until sold. 
    6. Remove from freezer 10 minutes before cutting
    7. Store any leftovers in freezer

    Rustic Peach Pie

    I love peach pie!! I always do mine with canned peaches. It is just a little too much work for me to blanch, peel, pit, and slice peaches! Canned peaches also lets you make this year round. If you use canned peaches drain them in a colander but save 3Tbsp of juice to add back in. I have made peach pie with peaches that I drained a little too well and it resulted in a dry pie without any of that amazing juice.

    You *really* should make the pie crust, especially since you're saving all that time using canned peaches! Once you taste it you will be oh so happy you took the time to make the crust. I found a crust recipe that I love because it makes enough dough for three crusts. That way I can stick some dough in the freezer for next time.


    Double Pie Crust (or single pie crust if you want to do a crumb topping)

    Filling
    1/3 cup all-purpose flour
    3/4 cup white granulated sugar
    1/2 teaspoon cinnamon
    1/4 cup butter, at room temperature
    8 to 10 large fresh peaches, pitted, peeled and sliced
    (or 2.5 LARGE cans of peaches, drained, with 3tbsp juice added back in)


    Egg wash
    1 egg whisked with 1 Tablespoon water
    course sugar for topping


    Instructions
    1. Preheat oven to 400 degrees F.

    2. In a medium bowl, use a fork to combine flour, sugar, cinnamon and butter. Mix until crumbly.

    3. Place one pie crust into a 9-inch pie plate. Scoop in one layer of peaches. Top with some of the crumbly sugar mixture. Layer more peaches and more crumbles. Continue until you've used up all of your peaches and crumbles.

    4.Top with second pie crust in a latice fashion, or with crumb topping
    (A found a great lattice tutorial here)

    5. Brush the top with the egg wash, and sprinkle with coarse sugar


    Bake for 30 minutes at 400 degrees. Cover loosely with aluminum foil and reduce temp to 350. You do not need to take the pie out, just reach in carefully and place the sheet of aluminum over the pie. It only needs to rest on the pie. My pies generally need another 30 minutes from this point. The top should be well browned and the filling should be bubbling when it is done.

    Saturday, August 4, 2012

    Cheesy Squash, Corn, and Eggplant Casseroles

    This dish has the most AMAZING blend of flavors. There is something crazy awesome about the way that melty cheese, sweet corn, savory tomatoes and eggplant compliment each other in this dish.  I noticed the way my hubby was eying up this casserole when I pulled it out of the oven. He asked me what was in it, then looked at it carefully. I could tell he looked skeptical, although he was careful not to say or do anything that might hurt my culinary feelings.  Two bites in, he said "Wow! This is really good!"  I followed this recipe as it was posted here in Healthy Bites Next time I might try adding in ground beef or italian sausage, although it was great without it :-)

    Serves: 4-6          Calories/Serving: 356 Ingredients:

    • 1 large eggplant, cut into 1/4-inch thick rounds
    • 1 large zucchini, cut into medium-sized cubes
    • 1 large yellow squash, cut into medium-sized cubes
    • 1c. onion, diced
    • 2 medium ears of sweet corn
    • Cooking spray
    • 1/2tsp salt, divided
    • 1/4tsp garlic powder
    • 8oz (1c) low fat ricotta cheese
    • 1c. (4oz) part-skim mozzarella, grated, divided
    • 1 large egg
    • 1/2c. basil, cut into medium strips
    • 1/4tsp thyme
    • 1/8tsp oregano
    • 1/4tsp pepper
    • 1 (15-oz) can of fire roasted tomatoes
    • 1 (8-oz) can no salt added tomato sauce
    • 1/4c (1oz) Parmesan cheese, finely grated 
    •  
    •  
    • 1. Preheat oven to 425. Spray 2 or 3 baking sheets with cooking spray.  Lay out egglant slices in a single layer on one tray (or two, if needed) Spread the zucchini, yellow squash, and onion on the other. Spray veggies lightly with cooking spray. Sprinkle 1/4 tsp salt on eggplant; sprinkle 1/4 tsp garlic powder on the squash mixture.  2. Remove husks from corn, wrap whole ears of corn in aluminum foil. Put ALL the veggies in the hot oven for 10 minutes. Flip the egglplant, and stir the squash, then put back in the oven for another 10 minutes, or until tender.  Leave the corn in the oven for an additional 15 minutes. 3. Turn the oven down to 325. When cool enough the handle, cut the kernels off the corn cobs. Mix into squash mixture. 4. In a bowl, mix together the ricotta, 1/2c  mozzarella, egg, basil, thyme, oregano, and pepper. Set it aside. 5. In a different bowl, combine the fire roasted tomatoes and the tomato sauce.  6. LAYER-o'clock! (This is the most fun part)  The casserole will have 3 layers. .
                     Layer 1: First, a little tomato mixture to coat the bottom of the dish, then eggplant. Spread on a little ricotta, then squash. Then a bit more tomato.
                    Layer 2:  More eggplant, more ricotta,  a bit of tomato, some squash, and a bit of tomato.
                    Layer 3: The rest of the eggplant,  remaining squash, remaining sauce, then the remaining cheese on the top. (I sprinkled on some extra spices at this point...I had a "Mediterranean" spice mix that was great) Sprinkle on the remaining mozzarella and the Parmesan.  7. Bake 375 for 40 minutes. ( I covered mine for most of the cook time) 
        Dig in!!!

    Sweet and Sour Chicken

    I've been waaaay slacking on posting my latest recipes. But this one was amazing, definitely a keeper! The original recipe did not include the peppers and onion, but I thought it made a nice addition :-)

     
    Here's what you need:
    1 Tablespoon plus 2 teaspoons soy sauce
    1 Tablespoon chicken broth ( I just sprinkle a little bouillon into warm water)
    1/2 teaspoon garlic powder
    1/2 teaspoon ground ginger
    1 lb boneless, skinless chicken breast
    1 can pineapple chunks (20 oz can--in juice)
    2 Tablepoons plus 1/4 cup cornstarch
    1 Tablespoon sugar
    1/4 cup apple cider vinegar
    1/4 cup ketchup
    1 Tablespoon canola oil
    1 red pepper
    1 green pepper
    1/4 sweet onion

    Step 1: Cut chicken into cubes. Then combine 1 TBSP soy sauce, broth, garlic and ginger; add chicken and marinate at least 30 minutes.Chop peppers and onion into chunks.
     Step 2: Drain pineapple, reserve juice. Add enough water to juice to measure 1 cup. In a bowl, mix 2 Tablespoons cornstarch, sugar and pineapple juice. Then add in the vinegar, ketchup and 2 tsp soy sauce.
    Step 3: Discard any remaining marinade from chicken. Coat chicken in remaining cornstarch. Stir-fry in oil until chicken is no longer pink. Meanwhile, stir-fry the peppers and onion. (Or of course you could just wait till the chicken is done and re-use the same skillet...). When chicken/veggies are done, set aside.
    Step 4: Stir pineapple juice mixture, add to the skillet that the chicken was in. Bring to a boil; cook and stir 2 minutes or until thickened. Add chicken, veggies, pineapple. Heat through. Serve with rice, if desired. 


    Thursday, June 21, 2012

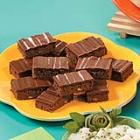
    Rich Chocolate Cake Bars

     (Picture and recipe taken from allrecipes)

     
    This week I've had the wonderful problem of needing to use up all the chocolate in the house before we move in a few days. I found a recipe that uses up 16oz of chocolate syrup and FOUR eggs. Considering we still have almost 2 dozen eggs this recipe made a good dent in my stash. I also doubled the butter called for, quite by accident. But since the idea here is to use EVERYTHING up, it was probably a good idea in retrospect. The recipe posted is for the original amount of butter. These came out great and were extremely fast and easy to make. I wasn't sure we could eat this much chocolate cake... but with the stress of moving we seem to be making good headway :D


    Ingredients

    • 1/2 cup butter, softened
    • 1 cup sugar
    • 4 eggs
    • 1 teaspoon vanilla extract
    • 1 (16 ounce) chocolate syrup
    • 1 cup all-purpose flour
    • 1/2 teaspoon baking powder
    • 1/4 teaspoon salt
    • GLAZE:
    • 1 cup sugar
    • 1/3 cup milk
    • 1/3 cup butter, cubed
    • 1/2 cup semisweet chocolate chips
    • 1 teaspoon vanilla extract

    Directions

    1. In a large mixing, cream the butter and sugar. Add eggs and vanilla; mix well. Stir in syrup. Combine the flour, baking powder and salt; add to creamed mixture an mix well. Stir in nuts. Pour in a greased 15-in. x 10-in. x 1-in. baking pan.
    2. Bake at 350 degrees F for 20-22 minutes or until a toothpick inserted near the center comes out clean. For glaze, combine the sugar, milk and butter in a heavy saucepan. Bring to a boil over medium heat; boil for 1 minutes.
    3. Remove from the heat. Add chips and vanilla; beat with a wooden spoon until smooth. Spread over warm bars. Cool on a wire rack before cutting.

    Tuesday, June 12, 2012

    Chicken Bacon Ranch Pasta


    Happy Tuesday! Every week I welcome Tuesday, my day off, as a chance to catch up on laundry, errands, and...cooking!! Most importantly, I have time to try out new recipes. Today I followed my usual series of events called Dinner Planning Adventure...which usually goes something like this:

     1) Inspect the cupboard and raid the fridge to analyze the ingredients I have on hand.
     2) Look for recipes that utilize those things.
     3) Improvise/adjust/tweak/healthify the recipe to my heart's content.
    4) Consider if hubby will like it
    5) Apply apron to self, and start cooking!

    Today's result was worth sharing. The basis of this recipe was borrowed from fellow blogger Cynthia Matzat .

     1 lb boneless, skinless chicken breast
    6 slices bacon, cooked and chopped
    1 and 1/4 cups skim milk
    1 packet Hidden Valley ranch dressing mix
    2 Tbsp flour
    1 bunch broccoli
    8 oz whole-wheat pasta (I used Penne)
    Salt and Pepper, to taste
    Parmesan cheese, to taste.

    (Next time I make this, I'm going to add in 1/4 cup chopped onion and a sprinkle of red pepper flakes)

    Cut chicken into cubes and cook in skillet with onion until barely browned.Sprinkle flour and dressing mix over chicken, stir to coat. Add milk and continue to cook over medium heat, stirring until mixture becomes thickened and bubbly.  Meanwhile, boil pasta in a separate pot. Add broccoli to boiling pasta for the last 8-10 minutes of pasta-boiling time. Drain pasta/broccoli. Combine with chicken/sauce mixture. Sprinkle with salt, pepper, red pepper and/or Parmesan cheese

    Saturday, June 9, 2012

    Impossible Peanut Butter Banana Bread


    This original version of this recipe came from JIF, the king of peanut butter. Seeing as this is a brand sponsored recipe you would think that they would have tested this recipe a few times before publishing it. I have made this 5 times now and FINALLY seem to have it adjusted. However it still has a few minor issues. It makes a large amount of batter, but not quite enough to bake 2 loves. I solved this by using my over-sized glass Pyrex bread pan and cooking it low and slow to get the inside to bake before the outside burns.

    You can also bake it in a bundt pan which works better as a bundt pan accommodates more batter. You could also pour into a typical sized bread pan make 1/2 a dozen muffins with the extra batter. The recipe that follows is for the xtra large bread pan. This really is a fantastic recipe... just a bit annoying. If you don't want to risk a raw middle and burned outside opt for the bundt pan and call it cake ;)


    • 2 cups PILLSBURY BEST® All Purpose Flour
    • 1 cup granulated sugar
    • 1 1/4 teaspoons baking powder
    • 1 teaspoon salt
    • 1 cup mashed ripe bananas
    • 1 cup JIF® Crunchy or Creamy Peanut Butter
    • 3/4-1 cup milk (if your eggs are small you might need closer to 1 cup so batter isn't too thick)
    • 1/4 cup CRISCO® Canola Oil
    • 2 large eggs

    Directions

    1. Heat oven to 325 degrees F. Grease 9 x 5 x 3-inch loaf pan.
    2. Combine flour, sugar, baking powder and salt in large bowl. Add banana, peanut butter, milk, canola oil, and egg. Beat at medium speed of electric mixer, scraping sides and bottom of bowl. Mix just until blended.
    3. Bake at 325 degrees F for 1 hour. 
    4. Reduce heat to 300 and cover with aluminum foil, bake about 10-20 minutes longer until toothpick inserted comes out clean
    5. Cool 10 minutes in pan. Remove to cooling rack. 
    6. If you chose a bundt pan bake it on 325 for about 50-60 minutes. No need to cover it

    Friday, June 1, 2012

    Baked Potato Fries


    I found this recipe here. The original recipe has the potatoes quartered, but I decided to cut them into fries and reduce the cooking time a bit. We had them with the chicken nugget recipe below :)


    • 1 1/4 pounds potatoes scrubbed and rinsed
    • 2tablespoons olive oil
    • 1tablespoon garlic, minced
    • 1/2 teaspoon dried rosemary, crushed fine
    • 1/2 teaspoon dried oregano
    • 1/2 teaspoon dried thyme
    • 1/2 teaspoon paprika
    • 1/2 teaspoon freshly ground black pepper
    • 1 teaspoon salt

    Preparation:

    Preheat oven to 425 degrees F.

    Cut each potato in half lengthwise. Cut each half in half again. Add the potato wedges to a large mixing bowl with the rest of the ingredients. (or cut into fries!!) Toss meticulously to coat the potatoes evenly.

    Line a sheet pan with foil. Place the potato wedges, skin side down, on the foil. Be sure to space evenly, so they cook uniformly. Bake for 35 minutes, or until well browned, crusty edged, and tender. Serve immediately, sprinkled with more salt if desired.If you are making fries reduce the heat to 410 degrees and bake 30 minutes. I took them out twice to stir around with a spatula.

    Baked Chicken Nuggets with Honey Mustard.

    Wow these are good! They aren't heavily breaded like the ones from the freezer and are so good. I made a honey mustard dipping sauce to go with. The blend of seasoning in the chicken is really nice and not something I ever would have though of.


    Ingredients

    • 1 1/4 pound, boneless chicken breasts
    • 1/4 cup Italian seasoned bread crumbs
    • 1/4 cup grated Parmesan cheese
    • 1 teaspoon salt
    • 1 teaspoon dried thyme
    • 1 tablespoon dried basil
    • 2 tbsp butter, melted
    • 2 tbsp warmed milk

    Directions

    1. Preheat oven to 400 degrees F (200 degrees C).
    2. Cut chicken breasts into 1 1/2-inch sized pieces. In a medium bowl, mix together the bread crumbs, cheese, salt, thyme and basil. Mix well. Put melted butter in a bowl with milk for dipping.
    3. Dip chicken pieces into the melted butter first, then coat with the breadcrumb mixture. Place the well-coated chicken pieces on a lightly greased cookie sheet in a single layer, and bake in the preheated oven for 15 minutes. 
    4. Turn on the broiler and bake for 3-5 more minutes until the tops are golden brown
    Honey Mustard Sauce (3 servings)

    Ingredients

    • 1/4 cup mayonnaise
    • 1 tablespoon prepared mustard
    • 1 tablespoon honey
    • 1/2 tablespoon lemon juice

    Directions

    1. In a small bowl, whisk together the mayonnaise, mustard, honey, and lemon juice. Store covered in the refrigerator.